
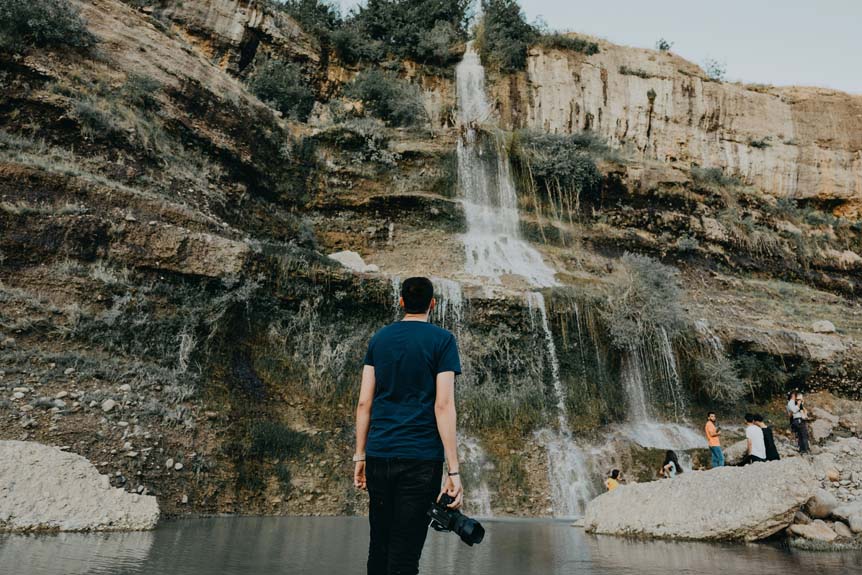
How to Photograph Landscapes in Bright Midday Sun
About the Author: Susan & Doug

Midday sun gets a bad reputation among landscape photographers, and honestly, it’s earned. The light is harsh, the shadows are short, and the contrast can blow out your sky while crushing your foreground. But here’s the thing — midday shooting doesn’t have to mean bad shots. With the right techniques, you can work with that brutal light instead of fighting it. Let’s break down exactly how.
Quick Answer
- Shoot in aperture priority or manual mode with f/8–f/16, ISO 100–200, and apply -1 to -2 stops exposure compensation to protect highlights.
- Use graduated ND filters to balance the bright sky and darker foreground, preventing overexposure in either zone.
- Seek open shade for softer, diffused light that reduces harsh contrast and minimizes washed-out colors in your scene.
- Leverage side lighting to reveal texture and depth in landscapes, or use backlighting to create dramatic silhouettes and glowing foliage.
- In post-processing, recover blown highlights using curves, graduated masks, and dehaze tools to restore detail and tonal balance.
Why Midday Sun Is Harder Than You Think
Midday sun might seem like a gift — bright, abundant light flooding your entire scene — but trust us, it’s one of the trickiest conditions to shoot in. Here’s what we’ve run into time and again:
Harsh midday light creates high contrast. That intense brightness blows out your highlights while pushing shadows into pure darkness, making correct exposure a genuine headache to nail down.
Overhead sunlight kills depth and texture. When light hammers straight down from above, it flattens your landscape and strips away the dimensionality that makes an image worth stopping for.
Colors wash out fast. That same intensity drains the vibrancy right out of your scene, leaving you with dull, unbalanced tones that no amount of editing fully rescues.
Shadows work against you. They creep across important details and cut through your composition in ways that feel awkward and distracting rather than intentional.
Lens flare becomes a real problem. Get anywhere near that direct sun in your frame and you’ll watch your overall clarity and sharpness take a hit you didn’t plan for.
How Midday Sun Direction Changes Your Shots
Once you understand why midday sun creates problems, you can start using its position to your advantage. In landscape photography, where the sun sits relative to your camera angle completely changes what you walk away with.
Once you understand the problem, the solution is already standing right in front of you.
Here’s how sun direction affects your shots:
- Overhead sun flattens shadows, reducing depth and texture in your image.
- Front lighting brightens scenes and boosts color saturation but minimizes dimension.
- Side lighting creates longer shadows that add texture and visual interest to landscapes.
- Backlighting emphasizes silhouettes and outlines, producing dramatic, moody compositions.
The good news is we can control the mood simply by repositioning ourselves relative to the midday sun — no extra gear, no waiting around. Just moving your feet reveals an entirely different image of the same scene.
We recommend experimenting with each direction before settling on your final camera angle, because honestly, the shot you almost walked past is often the one worth keeping.
Use Shadows to Shape Your Midday Landscape Shots
Strong shadows aren’t a problem to fix — they’re a creative tool we can use to shape our midday landscape shots. When we’re composing a midday landscape, we recommend looking for elements like trees, rocks, or cliffs that cast strong, defined shadows across the scene.
Here’s how we use them effectively:
- Guide the eye — Position shadows so they lead viewers toward your focal point.
- Add depth — Shadows create dimension that flat midday light otherwise removes from a landscape composition.
- Reveal texture — The contrast between lit surfaces and shadows highlights terrain details beautifully.
- Establish scale — Shadows from large structures or cliffs communicate spatial relationships instantly.
We don’t avoid midday shadows — we plan around them and let them strengthen our composition.
Find Open Shade for Softer Midday Landscape Light
When direct sun is unavoidable, open shade becomes one of our most reliable tools for capturing softer midday light. In landscape photography, open shade means your subject is shaded by distant trees or buildings but still has clear sky visibility above.
Here’s how we recommend working with it during bright midday:
- Scout shaded areas near distant tree lines or buildings that block direct sun.
- Confirm sky visibility overhead to ensure diffuse, even light reaches your subject.
- Watch for color casts — open shade keeps them minimal, unlike shooting under heavy overhead cover where things can get pretty muddy.
- Shoot toward shaded zones to bring down contrast and stop those highlights from blowing out on you.
This approach gives us better color saturation, natural tones, and evenly lit scenes without fighting harsh midday glare.
Camera Settings for Shooting in Bright Midday Sun
When shooting landscapes in bright midday sun, we recommend setting your aperture between f/8 and f/16 to maximize depth of field and reduce lens aberrations.
Keeping your ISO at its lowest native setting — typically ISO 100 — goes a long way toward minimizing noise and preserving that clean, crisp image quality we’re all after.
From there, take a little time to fine-tune your exposure compensation and shutter speed to protect those highlights and keep the sky from blowing out completely.
Optimal Aperture Settings
Shooting landscapes in bright midday sun means we’ll need a narrow aperture to keep our images sharp and properly exposed. Working between f/8 and f/16 gives us greater depth of field, keeping the entire scene in focus while keeping exposure in check.
Here’s how we recommend dialing in your aperture settings:
- Set aperture between f/8 and f/16 to maximize depth of field across the landscape.
- Drop your ISO down to 100 or 200 to cut down on noise and hold onto that image quality in bright light.
- Shoot in aperture-priority or manual mode for precise exposure control and consistent results.
- Throw on a graduated ND filter to balance exposure between the bright sky and darker foreground.
These steps help us pull off sharp, well-exposed landscape shots even when the midday light is working against us.
Managing Exposure Compensation
Managing exposure compensation becomes our next line of defense against blown-out highlights once we’ve locked in our aperture — especially when shooting in harsh midday sun.
Start by dialing in -1 to -2 stops of exposure compensation to prevent overexposure in the brightest areas of the scene.
Here’s our simple process:
- Take a test shot and immediately check your histogram.
- Look for highlight clipping — if the graph pushes hard to the right, reduce exposure further.
- Adjust incrementally until highlights retain visible detail without crushing your shadows too dark.
We recommend shooting in aperture priority mode, which lets us react quickly to shifting light conditions without missing the moment.
Small adjustments make a big difference — don’t wait until highlights are completely blown before stepping in and correcting course.
Ideal ISO Adjustments
Now that our aperture and exposure compensation are dialed in, let’s talk about ISO — and why we keep it as low as possible in bright midday sun.
In bright sunlight, a low ISO like 100 or 200 minimizes noise and protects highlight and shadow detail. Here’s how ISO fits into our exposure strategy:
- Start at ISO 100 or 200 — bright sunlight gives us plenty of light, so we don’t need extra sensor sensitivity.
- Avoid raising ISO unnecessarily — higher ISO in bright sunlight risks overexposure and lost detail.
- Pair low ISO with a narrow aperture — this maintains sharp depth of field without introducing grain.
- Trust your camera’s dynamic range — low ISO preserves it fully in high-contrast scenes.
How to Fix Harsh Highlights and Flat Skies in Post
Even when a midday shoot doesn’t go perfectly, we can fix harsh highlights and flat skies in post-processing. We recommend starting with adjustment layers or curves to selectively reduce brightness in blown-out highlight areas without touching the rest of the image — it’s a surprisingly precise way to reclaim detail you thought was gone for good.
Next, pull in graduated filters or radial masks to zero in on the sky specifically, nudging the exposure down to restore whatever detail is hiding in those washed-out regions. Clarity and dehaze tools are your best friends here — they’ve a knack for pulling texture and contrast back into flat, overexposed sky areas that look almost hopeless straight out of camera.
To pull the overall tone together, try adding subtle color grading or gradient overlays that take the edge off that harsh midday light. It’s one of those small touches that makes a big difference.
If the highlights are still giving you trouble after all that, we recommend considering a black and white conversion — leaning into tonal contrast to handle those overexposed areas while turning the whole scene into something genuinely dramatic and worth a second look.
Subjects That Thrive in Harsh Midday Light
Harsh midday light actually works in your favor for certain subjects—and once you start seeing them, you’ll wonder why you ever waited for golden hour.
Backlit leaves and foliage absolutely glow when the sun hits them straight on, turning an ordinary canopy into something almost luminous.
Textured landscapes and sand dunes come into their own under direct sun too, with every ridge and ripple throwing sharp shadows that reveal depth you’d completely miss in softer light.
And don’t overlook the small stuff—insects, water droplets, and other macro subjects practically jump off the frame when midday light catches their intricate details head-on.
Backlit Leaves and Foliage
While harsh midday sun challenges most landscape subjects, backlit leaves and foliage truly thrive in it. Position yourself with the sun directly behind the leaves and you’ll create a stunning halo effect, transforming translucent foliage into glowing, vibrant elements. Here’s how we make it work:
- Get the sun sitting right behind the leaves to light up those intricate veins and really make the colors pop.
- Shoot backlit leaves against darker backgrounds to maximize contrast and luminosity.
- Use a small aperture (f/11–f/16) to keep sharpness consistent across the foliage.
- Hunt for silhouettes of branches and leaves to add some dramatic contrast to your compositions.
Backlit leaves reward us with extraordinary detail and glow that flat midday light simply can’t produce any other way.
Textured Landscapes and Dunes
Backlit foliage isn’t the only subject that thrives under harsh midday sun—textured landscapes and dunes really come alive in it. The harsh light accentuates surface details, making ripples and patterns pop in ways that softer light simply can’t.
Here’s how we can make the most of it:
- Use side or slightly elevated angles to emphasize depth and dimension across dune surfaces.
- Let shadows work for us—the shadows cast by dunes and textured landforms add visual interest and reinforce their three-dimensional shape.
- Embrace the contrast—midday sun creates high contrast that sharpens textures and enhances color saturation in sandy or rocky terrain.
When we position ourselves thoughtfully and use the harsh light strategically, textures and shadows become our most powerful compositional tools.
Macro and Small Scenes
Macro and small scenes are another area where harsh midday light works in our favor. Unlike wide landscapes, small subjects don’t require managing complex shadows across large areas. Here’s how to make it work:
- Illuminate fine details — Direct harsh midday sun pulls out textures on flowers, insects, and surfaces that softer light simply won’t reveal in the same way.
- Control shadows creatively — Lean into those strong shadows to add depth and visual interest within a limited frame.
- Leverage high contrast — Switching to black and white lets you push those shapes and patterns as far as they’ll go.
- Reveal subtle surfaces — Intense macro lighting exposes surface details that diffused light tends to flatten out and hide.
☀️ Our Midday Shooting Kit
What we rely on when the light is harsh and waiting for golden hour isn’t an option:
- Circular polarizer to cut glare and boost contrast → Check price on Amazon →
- Variable ND filter for long exposures in bright light → Shop on B&H →
- Our full editing workflow for harsh-light landscape shots → See our editing software picks →
Affiliate links — we earn a small commission at no extra cost to you.
Frequently Asked Questions
Can I Use a Drone for Midday Landscape Photography Effectively?
Yes, we can use a drone effectively. Ensuring drone stability by flying in low wind, mastering aerial composition, respecting flight regulations, and choosing a wind-resistant model will help capture stunning midday landscape shots.
How Does Altitude Affect Exposure When Shooting Landscapes at Midday?
At higher elevations, we’ll notice altitude induced exposure variations as high altitude light reflection intensifies. We must adjust for mountain shadow contrast and manage elevation and dynamic range by reducing exposure compensation and using graduated ND filters.
What Lens Coatings Help Reduce Flare in Bright Midday Sunlight?
We’ll reduce flare by using multi-coating lenses that minimize internal reflections. Add anti-reflective coatings to cut glare, attach lens hoods to block stray light, and use polarizing filters to eliminate harsh midday surface reflections effectively.
Does Midday Heat Haze Significantly Impact Landscape Photo Sharpness?
Yes, midday heat distortion considerably reduces sharpness. Thermal turbulence bends light, causing atmospheric refraction that blurs details. For haze reduction, shooting earlier in the day, using telephoto lenses sparingly, and avoiding low-angle compositions over hot surfaces are all worthwhile approaches.
Which Memory Card Speed Is Best for RAW Midday Landscape Shoots?
We recommend UHS-II V60 cards. They offer fast write speeds for continuous RAW bursts, large enough capacity for a full day of shooting, and reliable performance that minimizes the risk of data corruption during your midday shoots.
Conclusion
We understand what you’re thinking—midday sun is just too harsh to bother with. But that’s exactly why mastering it sets you apart. Once we learn to use shadows creatively, find open shade, dial in our camera settings, and fix highlights in post, we turn midday’s biggest challenge into our greatest advantage. Don’t pack up your gear at noon—that’s when the real opportunities begin.
Before You Buy
Gear prices shift frequently — worth checking current listings before you buy. Browse the latest deals on travel photography gear at Amazon →or B&H Photo→
Keep Reading
Get the Free Europe Photography Packing Checklist
Everything we pack for a 2-week photography trip across Europe — free when you subscribe.
No spam, ever. Unsubscribe anytime.